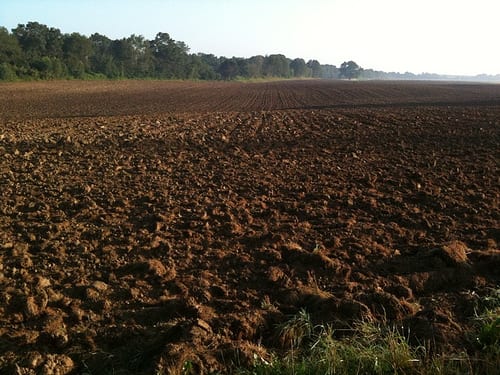
The key to raising healthy vegetables and herbs is by first starting with great soil. How do you know how good your soil is? A soil test is a good start. You can get your soil tested at a lab, which will give you a detailed analysis of the nutrients, and deficiencies in your soil.
While there are great soil testing labs around the country, I highly recommend finding a source local to you. Contact your local county extension office to find the nearest lab (usually at a University with an agriculture department). The reason for this is that a local lab will have the best understanding of the soil in your area, and will provide you with more accurate information for improving your soil. This type of test provides valuable information, but there are also ways that you assess your soil quality yourself.
A system called the Willamette Valley Soil Quality Guide was developed by a team of farmers and soil scientists in Oregon, and uses simple methods that any farmer or gardener can use. This system uses 10 easy steps to test soil on your farm or in your garden. As you do the tests, it is best to look at the results as a whole, instead of focusing too closely on results from a single test.
Tests like checking soil structure and tilth, plant residue, and compaction can be done year-round, and you can do all 10 steps during the active growing weeks in spring. For best results you should check various locations on your farm, or in your garden, since soil quality may vary.
Test 1: Soil Structure and Tilth
This test should be done with soil that is not too dry, nor too wet. (Don't assess frozen soil.) Dig a hole 6 to 10 inches deep and pull out a section of soil about the size of a soup can. Break the soil apart with your fingers to determine the structure. Is the soil granular, powdery, or have clods? Ideally, the soil should be made up of different sized aggregates (or crumbs), and they will hold their shape under slight pressure. If these crumbs are difficult to break apart, that means your soil is too hard.
A soil rich in organic matter is more porous which allows for easier movement of water and oxygen, which helps plants develop strong, healthy roots.
Test 2: Compaction
On farms, compacted soil occurs from farm machinery repeatedly passing over the same area of soil, and in home gardens it can occur in areas with heavy foot traffic. To test your level of compaction, you'll want to use something like a wire flag (usually available at hardware stores). Push the wire flag vertically into the soil and record the depth at which it bends due to resistance in the soil. Repeat this test in various parts of your field or garden.
Compacted soil severely restricts air and water movement through the soil, inhibits root growth, and reduces microbial activity and the ability of earthworms and other beneficial organisms to live in the soil.
Test 3: Workability
If you've already worked your fields or garden, you probably already know about your soil's workability. If the soil produces clods when tilling or digging, your workability is low. If you are farming with tractors, you can gauge workability by the amount of fuel your tractor uses to till the soil. If you are a gardener you can judge by the effort needed to prepare your beds.
Soil that is easier to work allows for better water infiltration, and is easier for preparing a good seedbed.
Test 4: Soil Organisms
A good quality of soil will be teeming with organisms such as centipedes, spiders, beetles and others. Dig a hole at least 6 inches deep and look into the hole. Make a list of the number of each species you find in a 2 to 4 minute period. If you count less than 10 total, you don't have enough organisms in your soil.
Good soil will have a thriving and diverse population of fungi, bacteria, insects and invertebrates. These organisms not only help break down organic matter and make nutrients more available for plant growth, they also help reduce the opportunity for pests and disease.
Test 5: Earthworms
Examine the surface of the soil for earthworm castings and burrows. (Do this when the soil is not too wet or too dry.) Then dig out about 6 inches of soil and count the number of earthworms found in the shovelful of soil. At a minimum you'll hopefully find three, but five or more is better. The absence of earthworms indicates that your soil does not have enough organic matter for them to feed on. Please note that you will be less likely to find earthworms in more desert-type locations such as in the Southwest.
Earthworms help to aerate the soil and increase water infiltration. Their casts infuse the soil with enzymes, bacteria, plant nutrients and organic matter. They also secrete compounds that help bind soil particles together which creates better tilth.
Test 6: Plant Residue
Plant residue can come from a previous crop (such as a cover crop), or from added organic material such as straw, leaves, manure, etc. Over time this plant residue breaks down, with the help of soil organisms, and becomes soil organic matter. This is the single most important component to healthy soil.
To assess residue decomposition dig down 6 inches, then examine the soil you pull out. Check for organic residue in various stages of decomposition. Smell the soil, does it have a sweet earthy smell, or no distinct smell, or does it have a sour, mucky smell? A sweet earthy smell is what you're looking for, and indicates good decomposition, as does a darkly colored humus.
Test 7: Plant Vigor
You'll do this test during the active growing season and will look for healthy plant color and size that appears relatively uniform. It will be helpful if you understand what overall health and development is considered normal in your region. You can learn this from other farmers or gardeners, from your local extension office, or from knowledgeable help at a local garden center. Please note that this test may be unreliable if you've had a drought, pest infestations, or if you planted later than recommended.
Plant vigor is a great indicator of effective soil management.
Test 8: Root Growth
You can assess root growth at the same time you are assessing plant vigor. As with the other tests, moisture conditions should be similar. Using a hand trowel, gently dig around a selected plant as extensively as possible to get an idea of how deep the roots extend into the soil. Check the root system by separating the roots and checking the root development, number of fine roots, and color of new roots. Brown, mushy roots indicate serious drainage problems. Stunted roots could indicate disease, or the presence of pests feeding on the roots.
Test 9: Water Infiltration
Water infiltration is the movement of water into the soil. A porous soil allows good infiltration, which in turn gets water to the plant's roots—where they need it. It also prevents run-off, and erosion.
For this test you'll need a cylinder of some sort—a large empty coffee can with no bottom will work. Push it into the soil so about 3 inches extends above the soil to allow water to "pond" there. Gently fill the can with water, and note the time it takes for the water to be absorbed into the soil. Repeat this several times until the soil becomes saturated and your times become consistent. Absorption rates slower than 1/2 to 1 inch per hour indicate compacted soil.
Test 10: Water Availability
Water held in soil pores that is extractable by plant roots is called available water. This water is more resistant to evaporation and better supplies plants between waterings.
The next time you have a soaking rain, record how long it takes until plants begin showing signs of needing watering again. Longer times indicate better water availability and are another sign of good soil structure and soil organic matter.
For more detailed information on these tests, and a handy printable card, download these two PDFs from the Oregon State University: